Delve into the realm of PlayStation 4 HDMI repair, a comprehensive guide that empowers you to diagnose and resolve HDMI issues, ensuring seamless gaming experiences. With a blend of practical troubleshooting techniques and advanced repair strategies, this guide equips you with the knowledge to restore your console’s HDMI functionality.
Explore common causes of HDMI port malfunctions, learn how to inspect and replace cables, delve into HDMI settings and configurations, and discover advanced repair techniques for experienced users. Whether you prefer DIY repairs or seek professional assistance, this guide provides invaluable insights and guidance.
HDMI Port Troubleshooting

HDMI port issues on PlayStation 4 can be caused by various factors, including loose connections, damaged cables, or internal hardware malfunctions. To troubleshoot these issues, follow these steps:
- Ensure that the HDMI cable is securely plugged into both the PlayStation 4 and the TV or monitor.
- Try using a different HDMI cable to rule out any cable defects.
- Check the HDMI port on the PlayStation 4 for any visible damage or debris. If necessary, clean the port gently with a soft brush or compressed air.
- Restart the PlayStation 4 and the TV or monitor. This can sometimes resolve temporary software glitches that may affect HDMI functionality.
If the above steps do not resolve the issue, there may be a hardware or software problem with the PlayStation 4. In such cases, consider seeking professional repair services.
HDMI Cable Inspection and Replacement
Inspect the HDMI cable for any physical damage, such as cuts, fraying, or bent connectors. If the cable appears damaged, replace it with a high-quality HDMI cable that meets the HDMI 2.0 or higher standard.
Using a high-quality HDMI cable is crucial for ensuring reliable signal transmission and preventing HDMI issues. Look for cables that are certified by reputable organizations such as HDMI Licensing Administrator (HDMI LA).
HDMI Settings and Configuration

The PlayStation 4 offers various HDMI settings that allow you to optimize the display output for your TV or monitor. To access these settings:
- Go to Settings > Sound and Screen > Video Output Settings.
- Adjust the following settings according to your display capabilities:
- Resolution: Select the highest resolution supported by your TV or monitor.
- HDR: Enable HDR if your TV or monitor supports it.
- Deep Color Output: Enable this setting for improved color accuracy.
Once you have configured the HDMI settings, test the display output to ensure that it is working correctly.
Advanced HDMI Repair Techniques

Advanced HDMI repair techniques are recommended for experienced users who are comfortable with soldering and working with electronic components. These techniques involve:
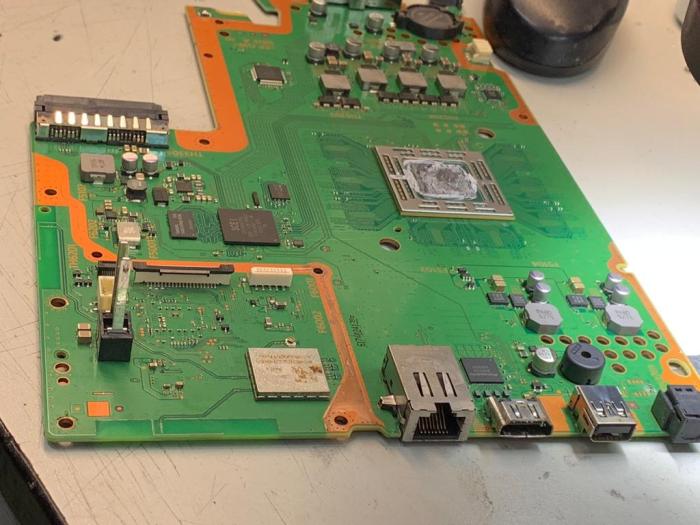
- Soldering a new HDMI port onto the PlayStation 4 motherboard.
- Replacing internal components, such as capacitors or resistors, that may have failed.
Before attempting advanced HDMI repairs, it is essential to take safety precautions, such as wearing anti-static wrist straps and using proper tools. Additionally, it is highly recommended to consult with a qualified technician if you are not confident in performing these repairs yourself.
DIY Repair Considerations: Playstation 4 Hdmi Repair
DIY HDMI repairs can be a cost-effective option if you have the necessary skills and tools. However, it is important to consider the following:
- Difficulty: DIY HDMI repairs can be challenging, especially for those without prior experience in electronics repair.
- Warranty: Attempting DIY repairs may void the warranty on your PlayStation 4.
- Risk of Damage: If the repair is not performed correctly, you may further damage the PlayStation 4.
If you decide to attempt a DIY HDMI repair, follow these steps:
- Gather the necessary tools, including a soldering iron, solder, flux, and a replacement HDMI port.
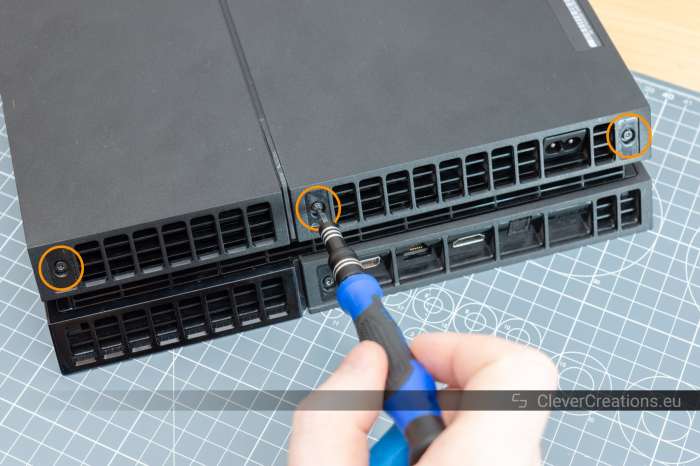
- Disassemble the PlayStation 4 and locate the HDMI port.
- Desolder the old HDMI port and solder the new one in its place.
- Reassemble the PlayStation 4 and test the HDMI output.
Professional Repair Services

If you are not comfortable performing DIY HDMI repairs or if the issue is beyond your expertise, it is recommended to seek professional repair services. Reputable repair centers or technicians can diagnose and fix HDMI issues efficiently and safely.
When choosing a repair service, consider the following factors:
- Experience and reputation.
- Cost of repairs.
- Warranty or guarantee on repairs.
Preventative Maintenance
To prevent HDMI issues on your PlayStation 4, follow these tips:
- Handle HDMI cables with care. Avoid bending or twisting the cables excessively.
- Store HDMI cables properly when not in use.
- Regularly clean the HDMI ports on the PlayStation 4 and your TV or monitor.
- Avoid using low-quality HDMI cables.
- Ensure that the PlayStation 4 is well-ventilated to prevent overheating, which can damage the HDMI port.
Essential Questionnaire
What are the common causes of HDMI port issues on PlayStation 4?
Common causes include loose connections, damaged cables, faulty HDMI ports, and software glitches.
How can I troubleshoot HDMI connection problems on my PlayStation 4?
Check connections, inspect cables for damage, try a different HDMI port on your TV, and restart your console.
Can I replace the HDMI port on my PlayStation 4 myself?
Yes, but it requires advanced soldering skills and technical expertise. DIY repairs are not recommended for beginners.
